Insert a Link to an Email Address
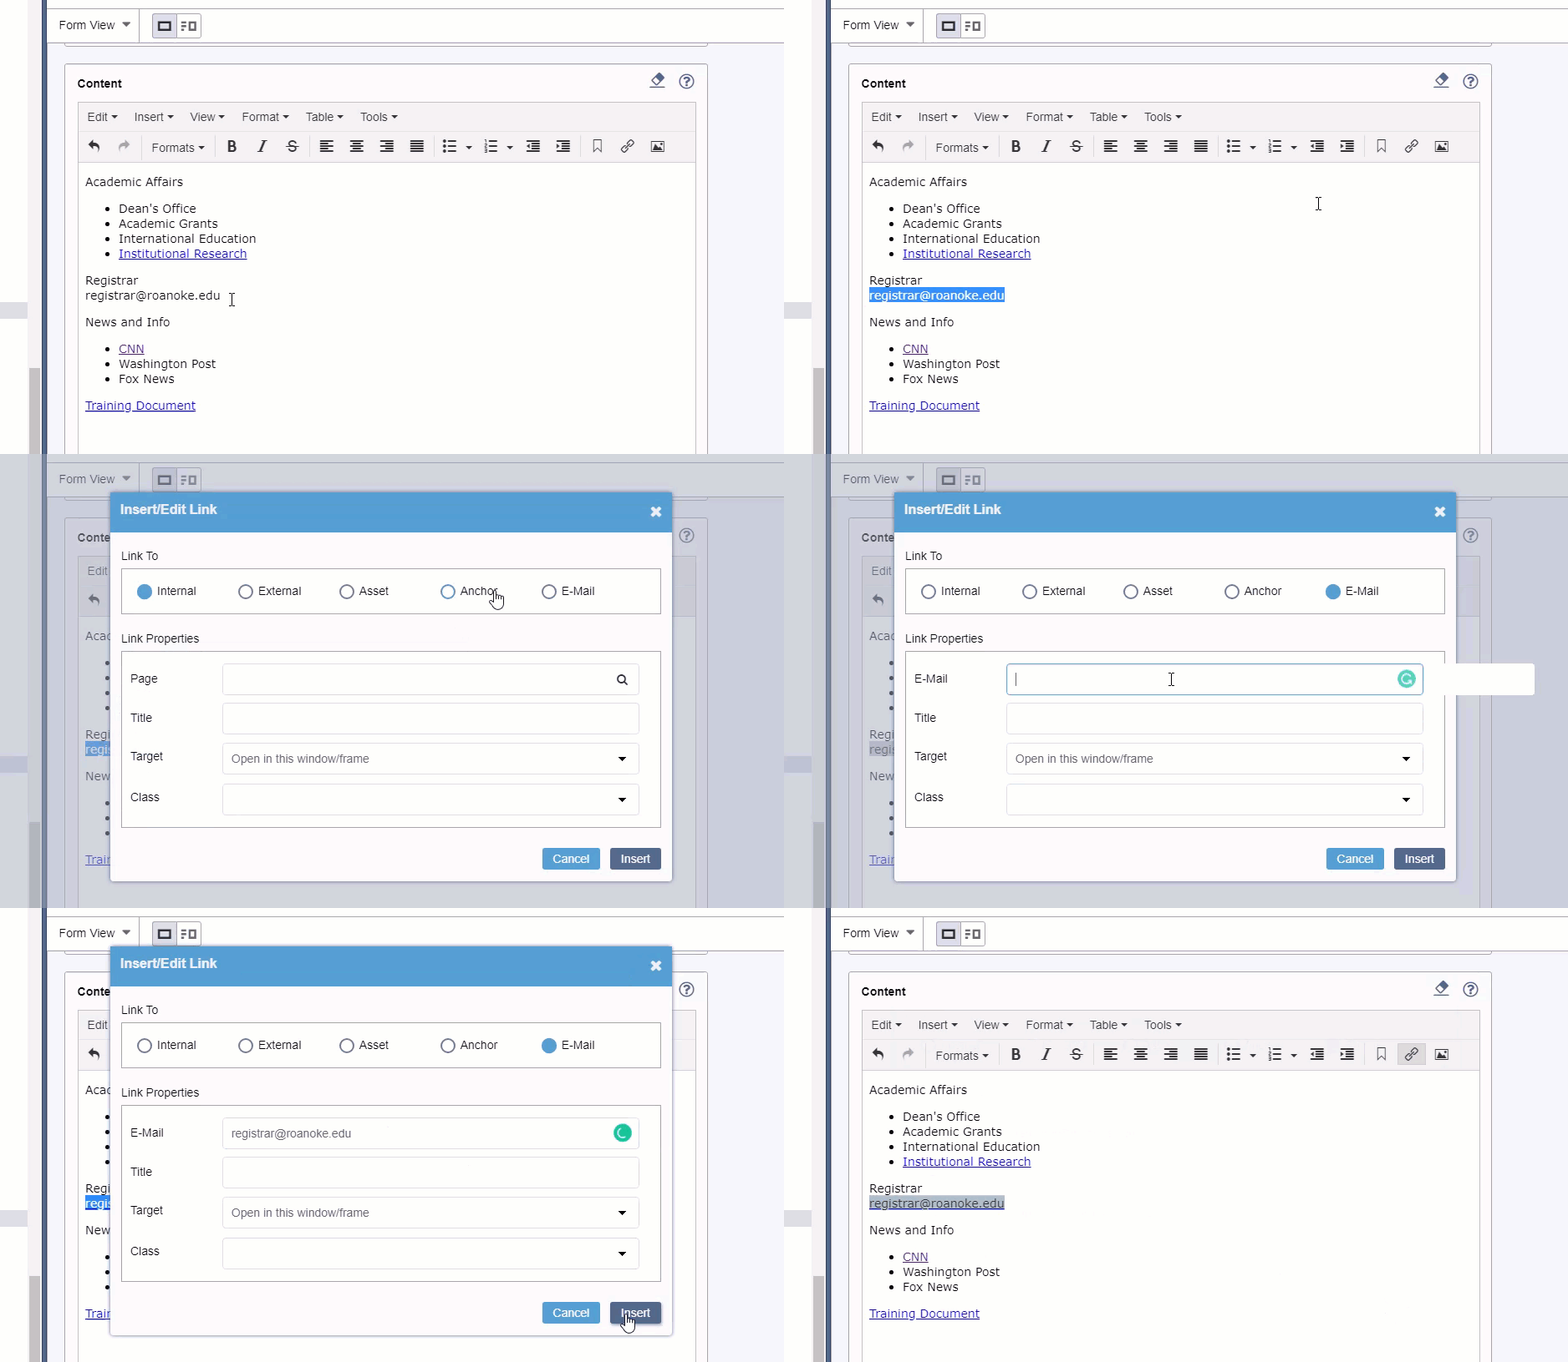
Highlight the text you wish to link. Then right-click and select Insert Link.
- Select Email at the top
- Under E-Mail, type in the full email address and then click Insert.

Important: Images are now Assets and must be both Checked In and Marked for Publish before they will appear on your page. Upload the picture – Go to Assets, then Click the Upload icon. Browse to the location where the picture is saved and select it. Then, click Upload. Double click the Images folder Find the…
Important: Documents are now Assets and must be both Checked In and Marked for Publish before they will appear on your page. Go to Assets icon. Navigate to the correct Documents Folder Click the “Upload” button on the top right. Click, “Select File to Upload,” Browse to the location where the document is saved and…
Previously we have edited pages with Form View. For Components you will need to access Design view to add, delete and reorder them. Check the page out and click on Design View This will load a visual view of your page, similar to Preview. After your main on-page content, you will see the Page Builder…
Photo Grid Has Title Subtitle Design Treatment Layout 2 Column 4 Column Top Content Repeatable Photo Rows, With: Photo Content Photo Alignment Left Right Bottom Content
Ensure you have Uploaded Your Document into Ingeniux Insert the link – Highlight the text you wish to link. Then click the Insert/edit Link button. Select Asset at the top Click on the browse button beside Asset to select the document. Find the asset and click Insert
Open Google Chrome or Mozilla Firefox and type: https://webedit.roanoke.edu use the Default login Option “Roanoke Azure” and click the Login Button. If you already logged in, you will be signed in right away. Otherwise follow the steps to login with you Roanoke email and Password.