Setting Up Your Availability &Target Hours
Availability
As a new user, the first thing you need to do is set up availability so that students can schedule appointments to see you. It is important to note that locations and services are created by institution administrators.
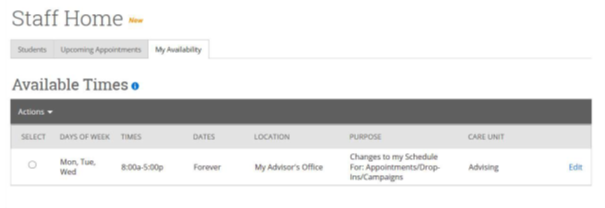
Add Time –
Step 1: Click the Add Time button in the Actions Menu
Step 2: Select the days as well as start and end time in the From and To fields.
Step 3: Set the length of the availability with the How Long Is this Availability Active? field.
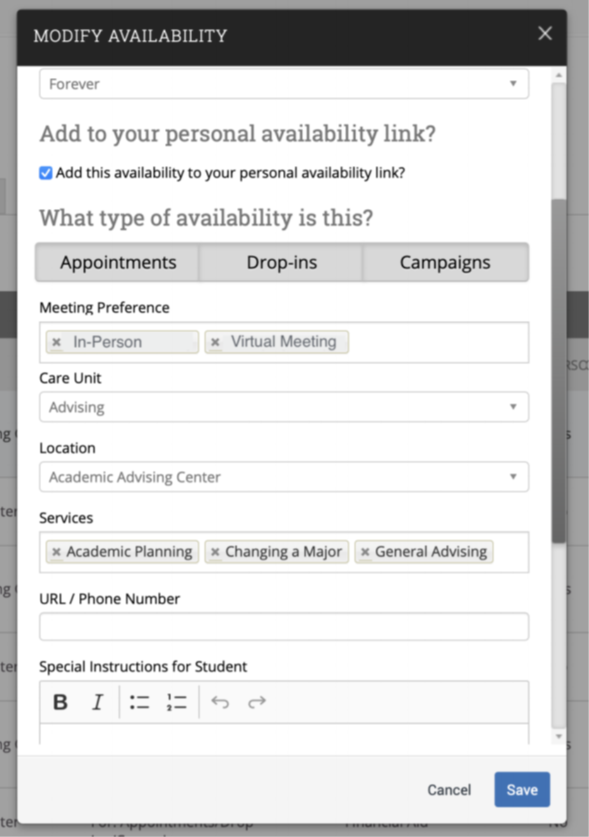
Step 4: If you want this availability added to your personal availability link, select Add This Availability to Your Personal Availability Link? You can put the personal availability link in an email or text or on a website. Students are taken to a scheduling workflow that has the staff/faculty’s chosen availabilities pre-filled. (Note: Personality Availability Link only works for regular Appointments, not for Drop-in’s and Campaigns)
Step 5: Select your Availability types. You can choose more than one at a time. For example, an availability can be for both Drop-In and Appointments.
Step 6: For Meeting Preference, select the applicable meeting modality.
Step 7: For Care Unit, select appropriate functional area.
Step 8: Choose the location where you will be available.
Step 9: Select services you can provide students during this availability. You must choose at least one service but can pick more.
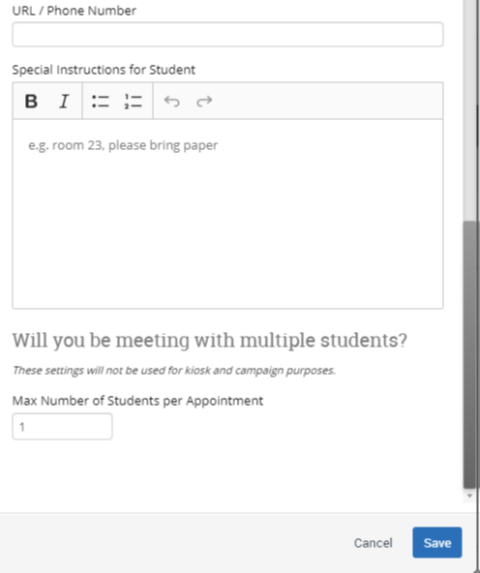
Step 10: In the URL / Phone Number field, add your
meeting link for your appointments.
Step 11: Use the Special Instructions box to include
additional details for students. (Example: We will use
Zoom for our meeting, which you can access by using
the link provided. Virtual meeting spaces allow us the
flexibility to connect from various spaces. Please
ensure the space you are in is conducive for such a
meeting. I very much look forward to meeting with
you!)
Step 12: If you want to hold group appointments, you
can specify the number under Max Number of Students
per Appointment. Otherwise, you can leave is as 1 for
one-on-one appointments.
Step 13: Click the Save button.
Step 14: Repeat this process until all your
availabilities have been defined.
• You can have as much availability as needed.
• Creating multiple availabilities will enable you to set
aside specific blocks for specific services
(registration advising for example) or meeting types
(drop ins vs. scheduled appointments)
Editing Availability:
Copy Time – to copy a time, select the time you would like to copy and then click the Copy Time
button. The availabilities will be copied, and a dialog will open allowing you to make edits or to save
your newly created availability.
Delete Time– to delete your time, simply select the time and click the Delete Time button.
Group Appointments – You can create availability for group appointments by indicating how many
students are able to schedule into the same appointment (indicate specific number under “Max
Number of Students per Appointment”)
Inactive availabilities are highlighted in red in the Times Available grid.
Setting Up Your Target Hours
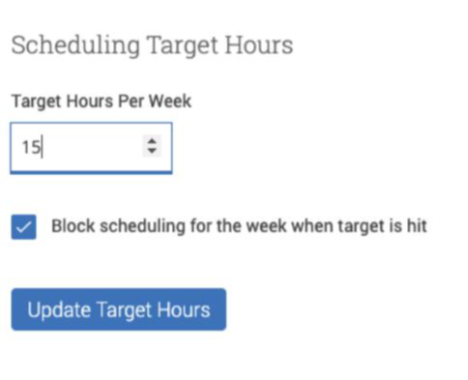
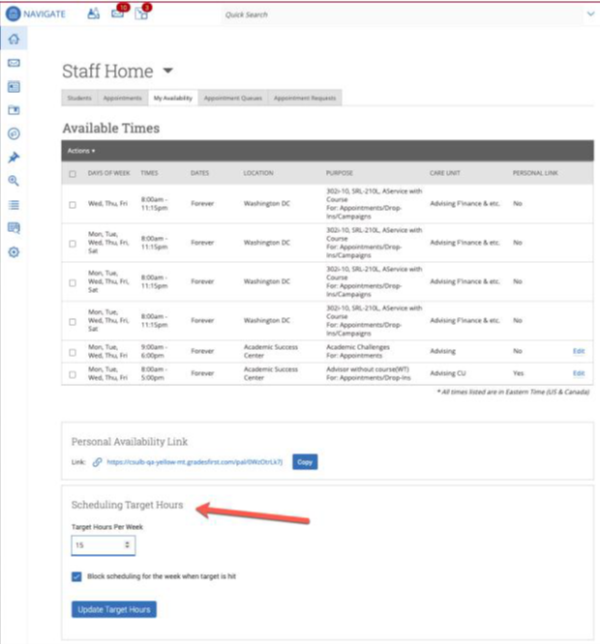 Target Hours allow staff to restrict the number of hours in which they can be scheduled for appointments via Student Scheduler.
- Staff set their Target Hours in the Scheduling Target Hours section.
- Target Hours have two aspects:
1.Target Hours Per Week: This is the maximum number of hours per week in which they can be scheduled for an appointment. (You can set this between 1-168 hours.)
2.Block scheduling for the week when target is hit: If selected (and hours have been reached), the staff member will no longer be available to students for appointments for the remainder of the week. - Note: Target Hours are calculated against all Services, Locations, and Care Units. Your Leadership Team will provide clarification on how this feature should be used.