How to Register for Classes with Ellucian Go
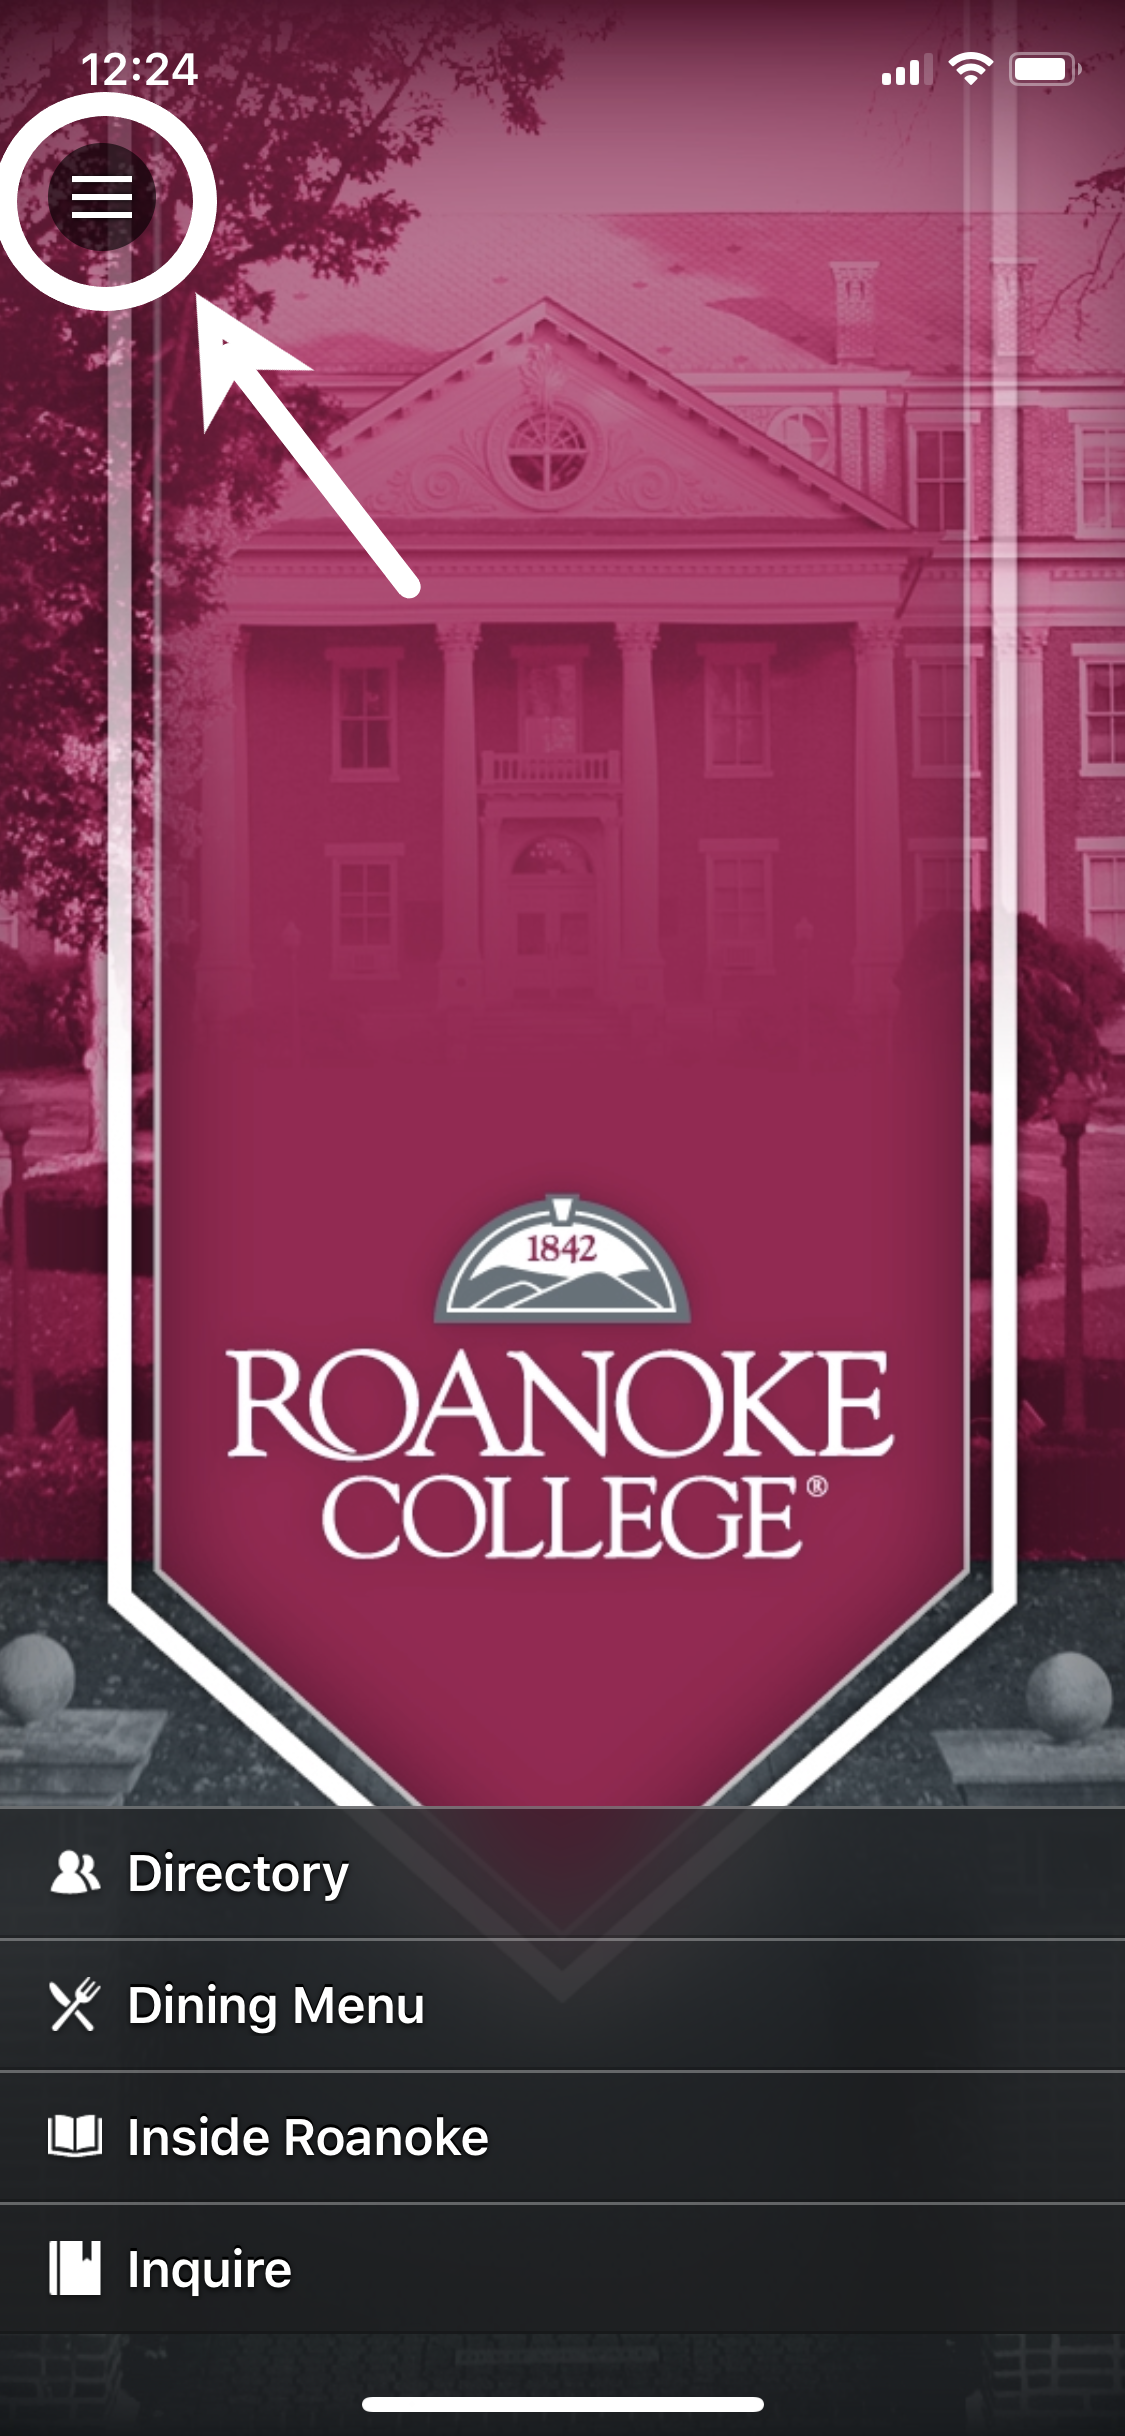
- Open the Ellucian Go app and tap the “hamburger menu” icon located on the upper left side of the screen as show below.
- Next, please direct your attention to the Academics heading as pictured below. Once you have clicked this heading, please locate and select the Registration tab. If you are unable to locate the Registration tab, then please scroll to the bottom of the screen to ensure that you have logged in with your RC credentials. (Please note that the Registration tab only appears if you have authenticated using your RC credentials.)


- Once you reach the main registration screen, you might find course sections already showing in your cart. If so, then this would be the result of previous planning by either you or your advisor in Self-Service—or even in this app. If you have already completed your planning, then you may skip the following step and proceed to register.
- On the main registration screen, you may search for classes by clicking the magnifying class at the bottom center of the screen. In the ensuing screen, you may select a term (such as Fall Term, 2020) and enter search criteria (such as “INQ” or “business”) before pressing the Search button. If performed successfully, all relevant sections for the selected term will appear as indicated in the middle screenshot below. You should also notice section availability information located on the far right of the screen next to each offering.
- Once you have identified a section(s) of interest, then select the small circle next to the section(s) and then Add to Cart— which is the greyed-out bar at the bottom of the screen as shown in the middle screenshot below. You will receive a notification stating that you have successfully added the section(s) to your cart (see third screenshot from the left below).

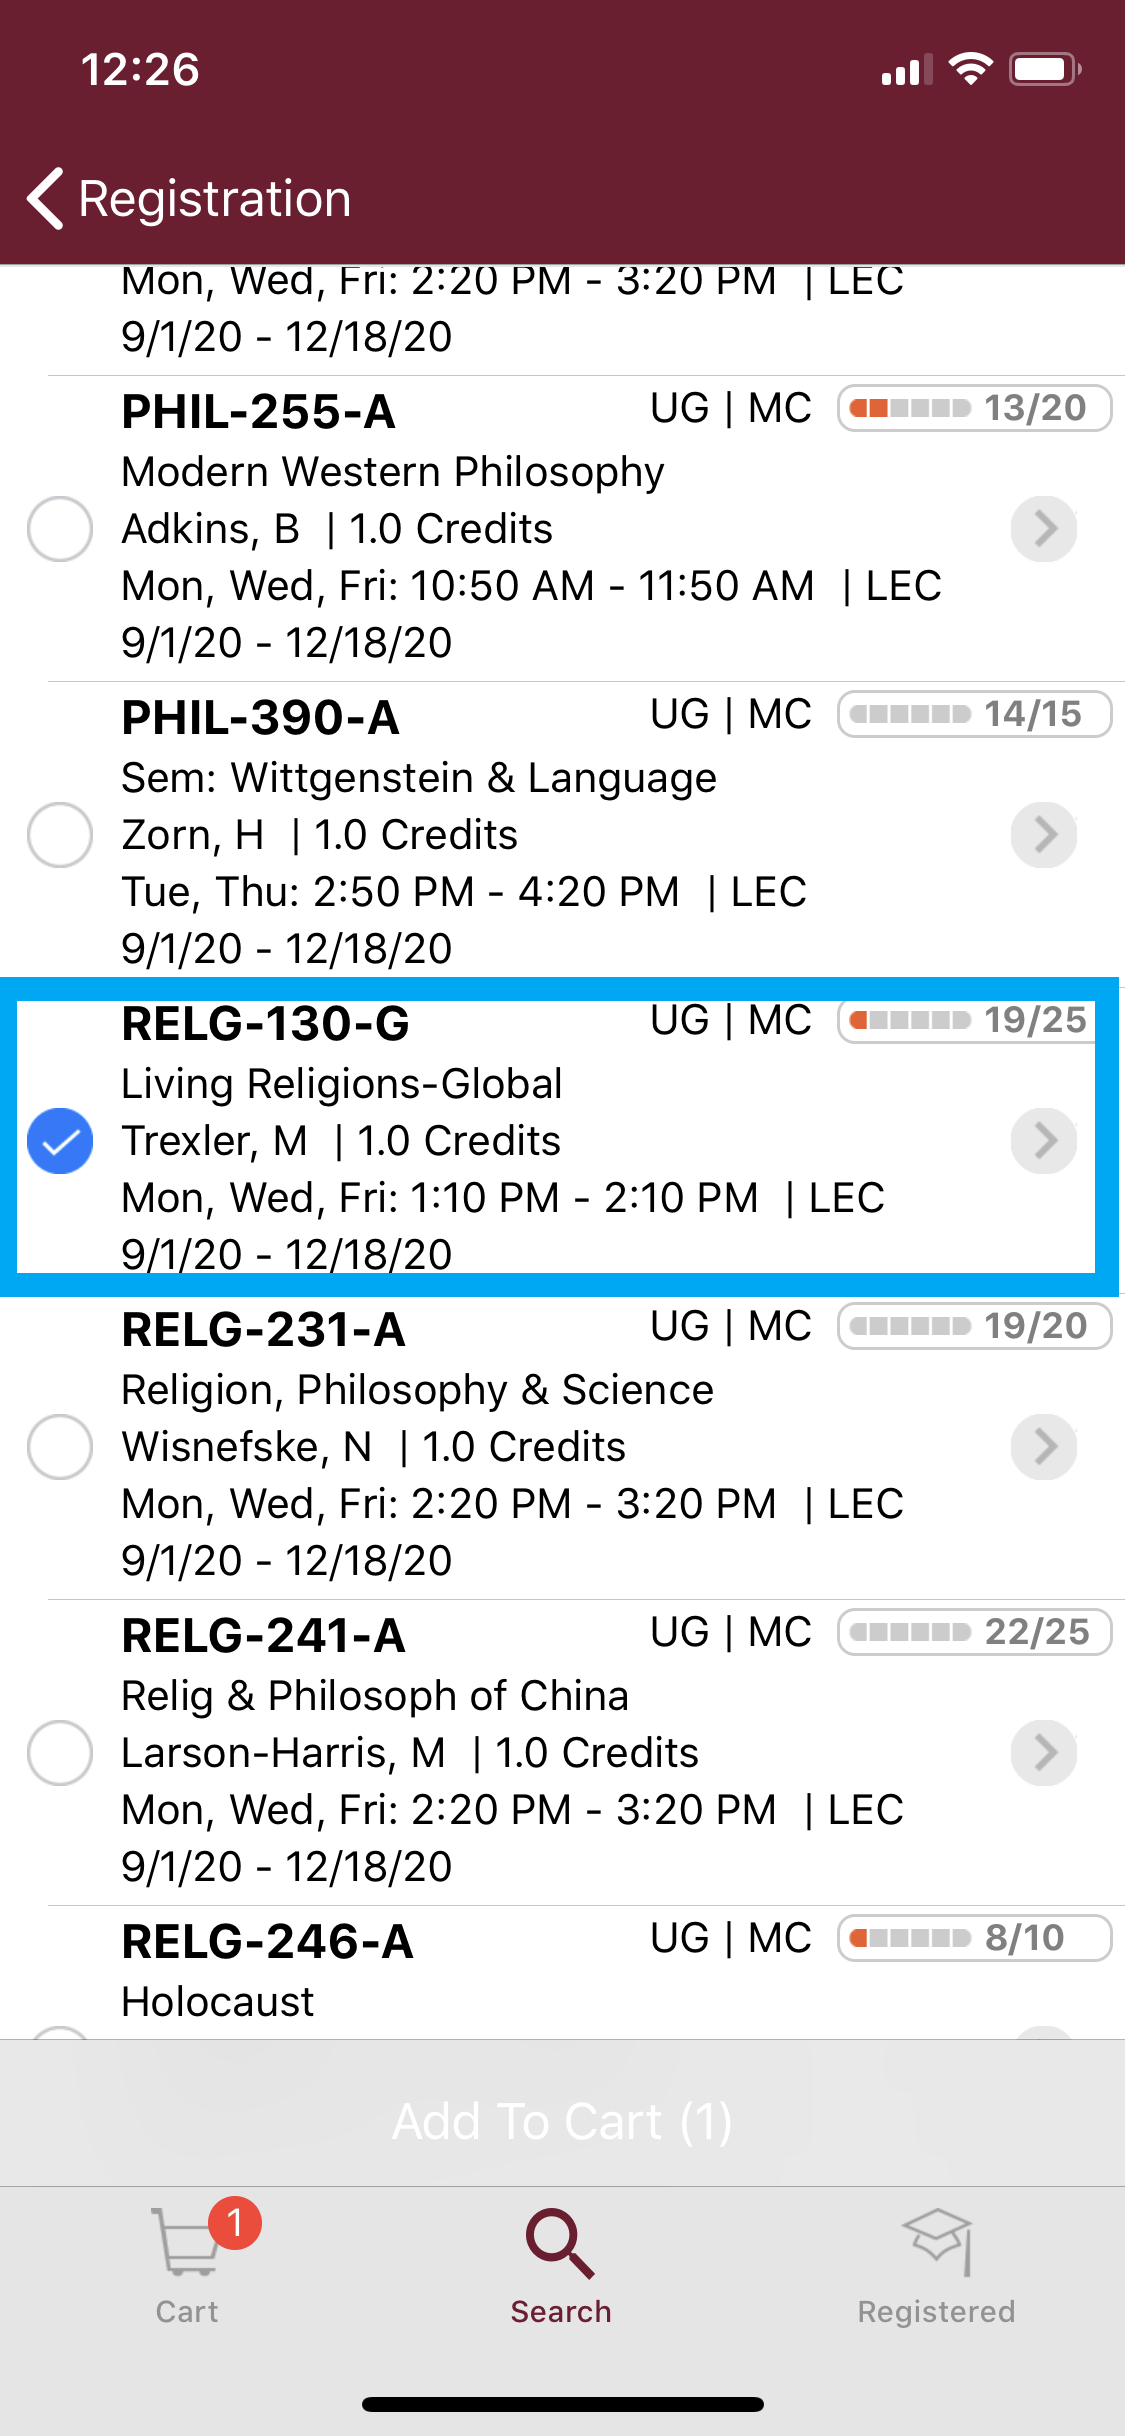
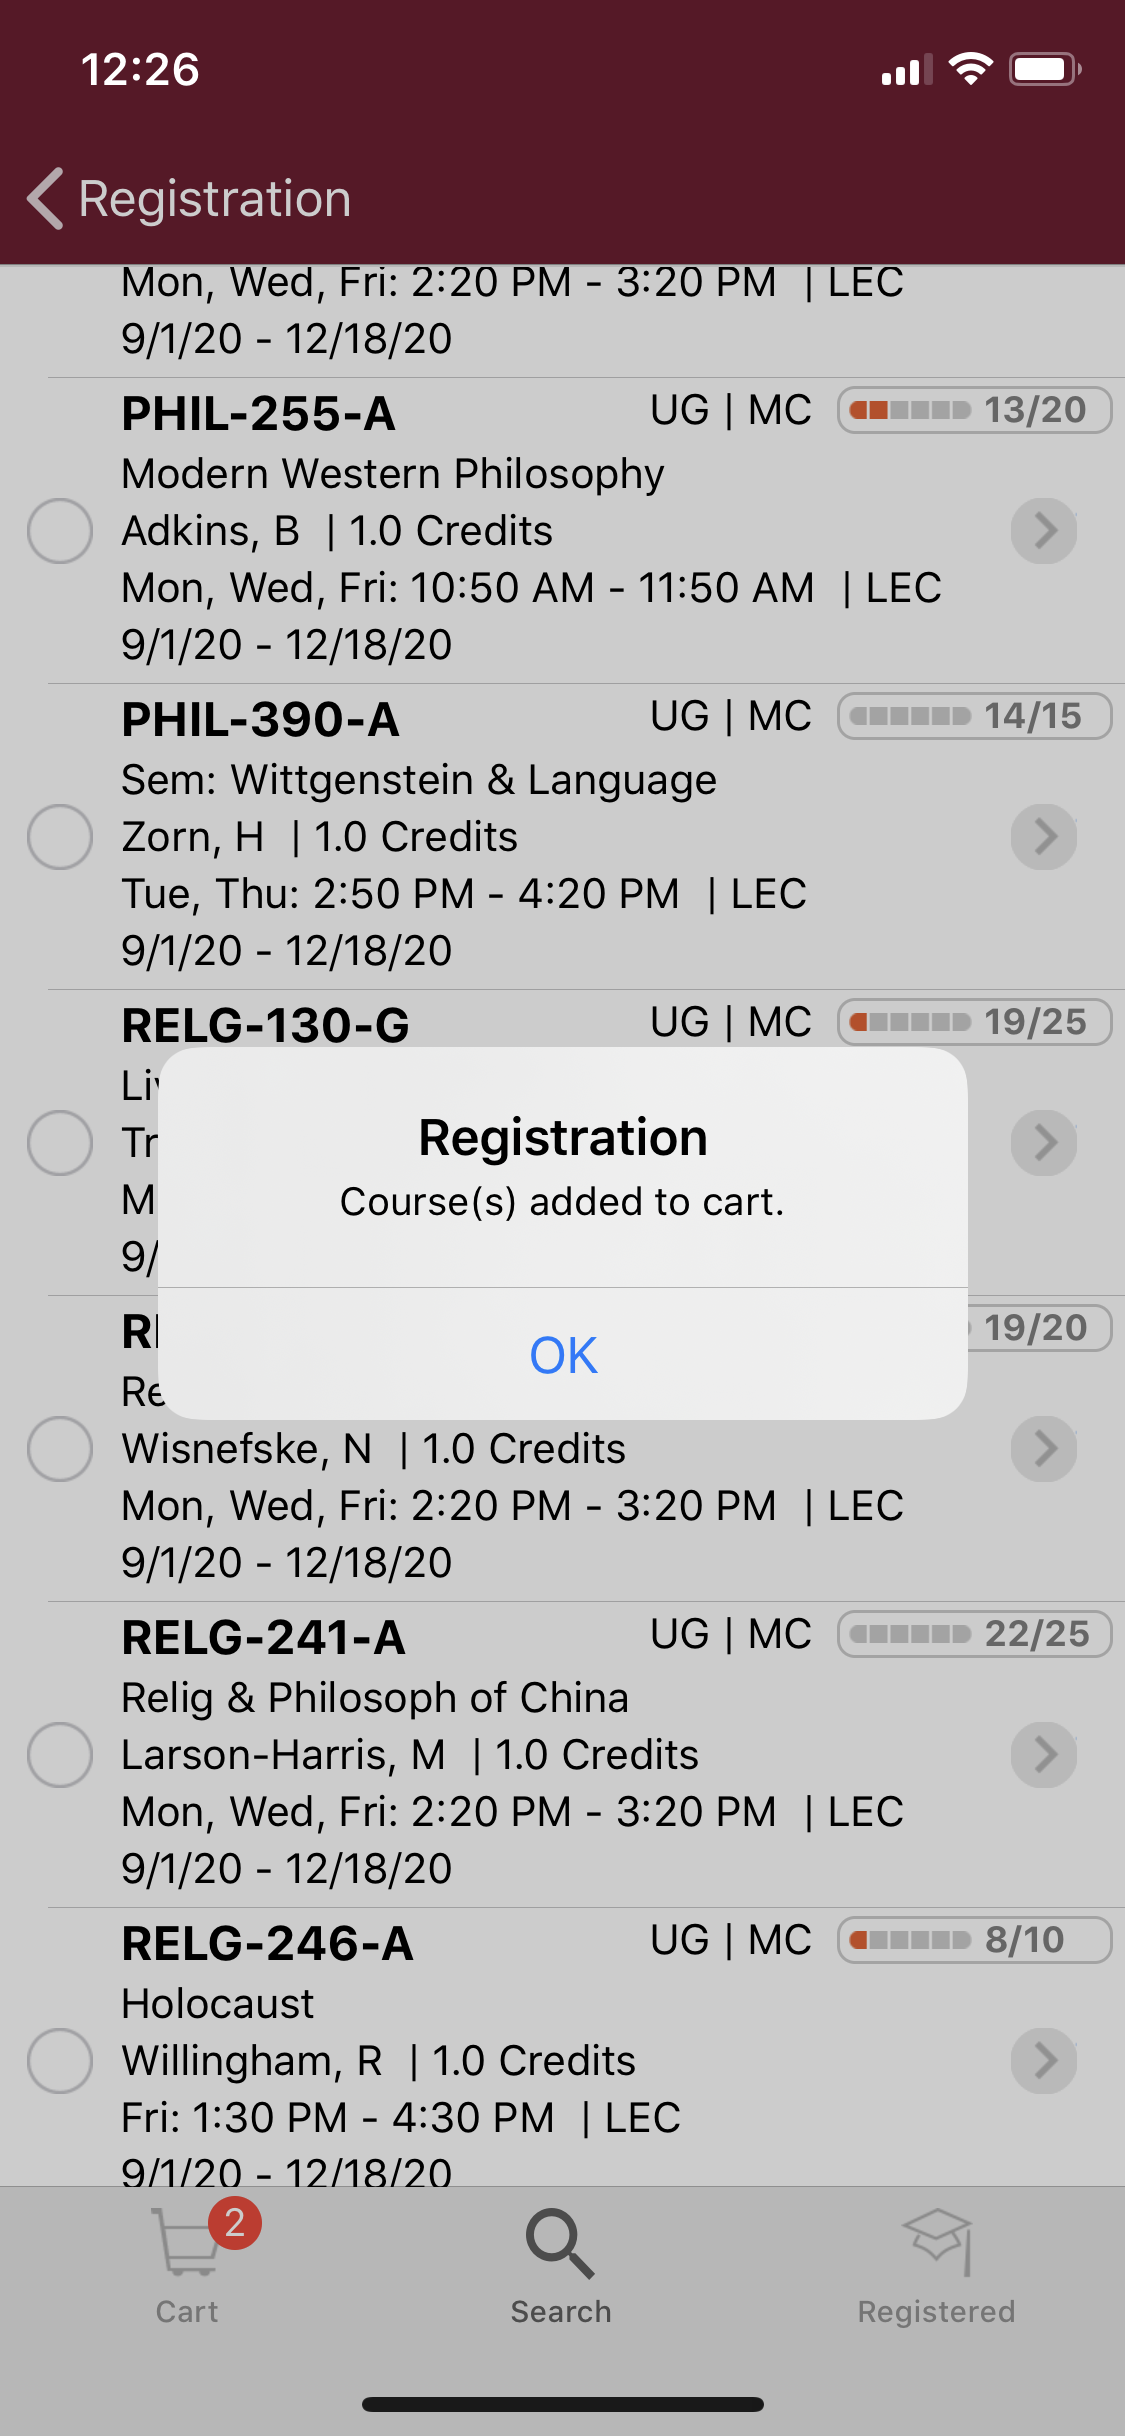
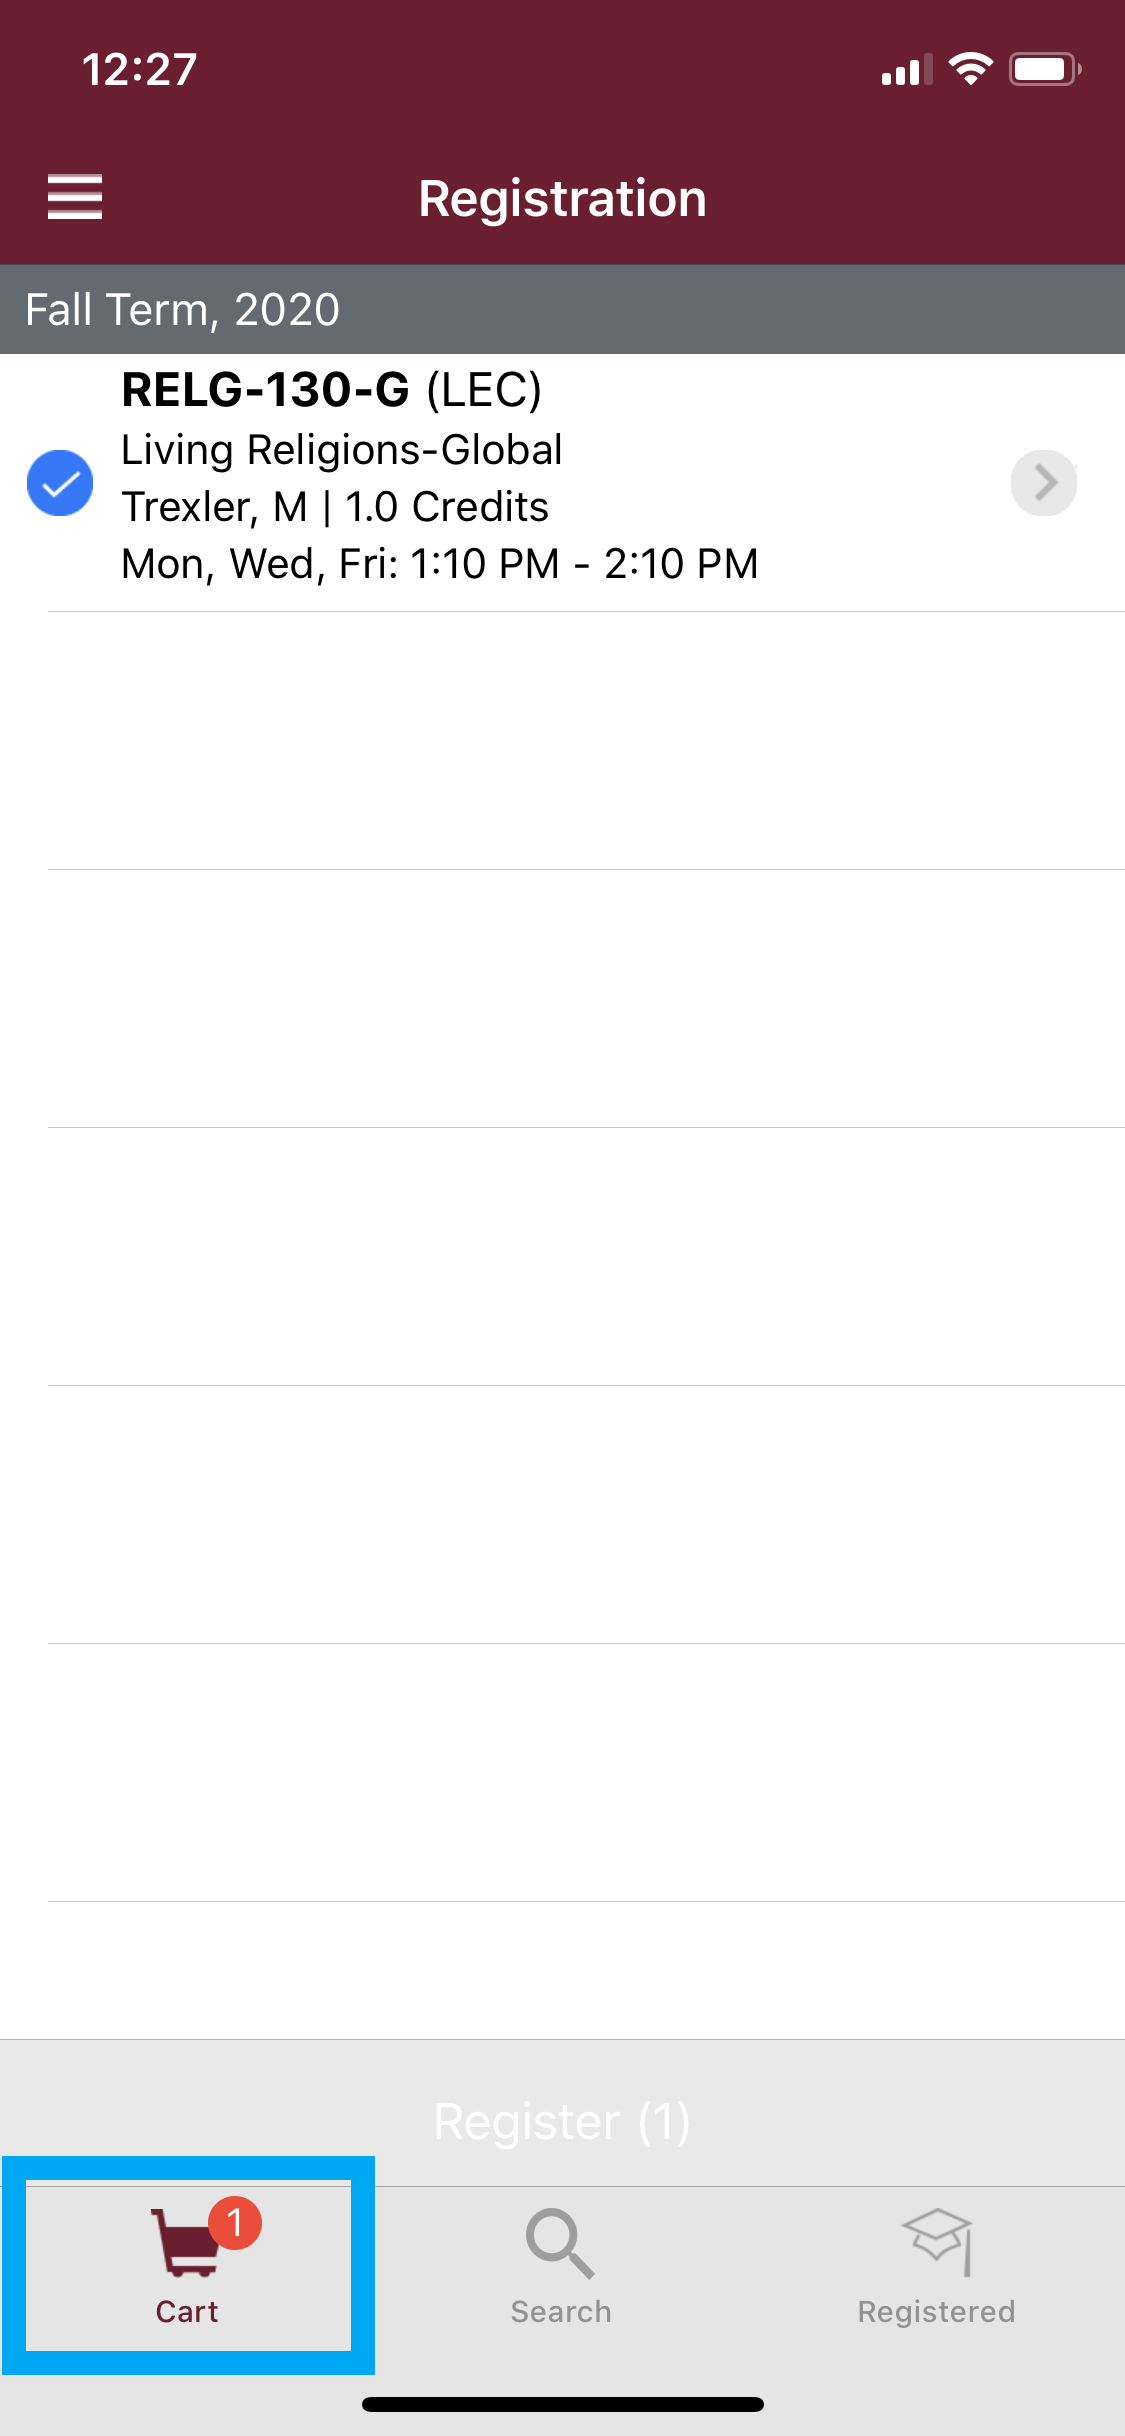
- Once you have selected the section(s) for which you wish to register, click Cart, which is shown squared in blue in the left screenshot below.
- Select the small circle next to the section(s) for which you wish to register and click “Register” at the bottom.
- Note: Just like the Add to Cart button, the “Register” button also appears greyed-out at the bottom of the screen as indicated in the left screenshot below.

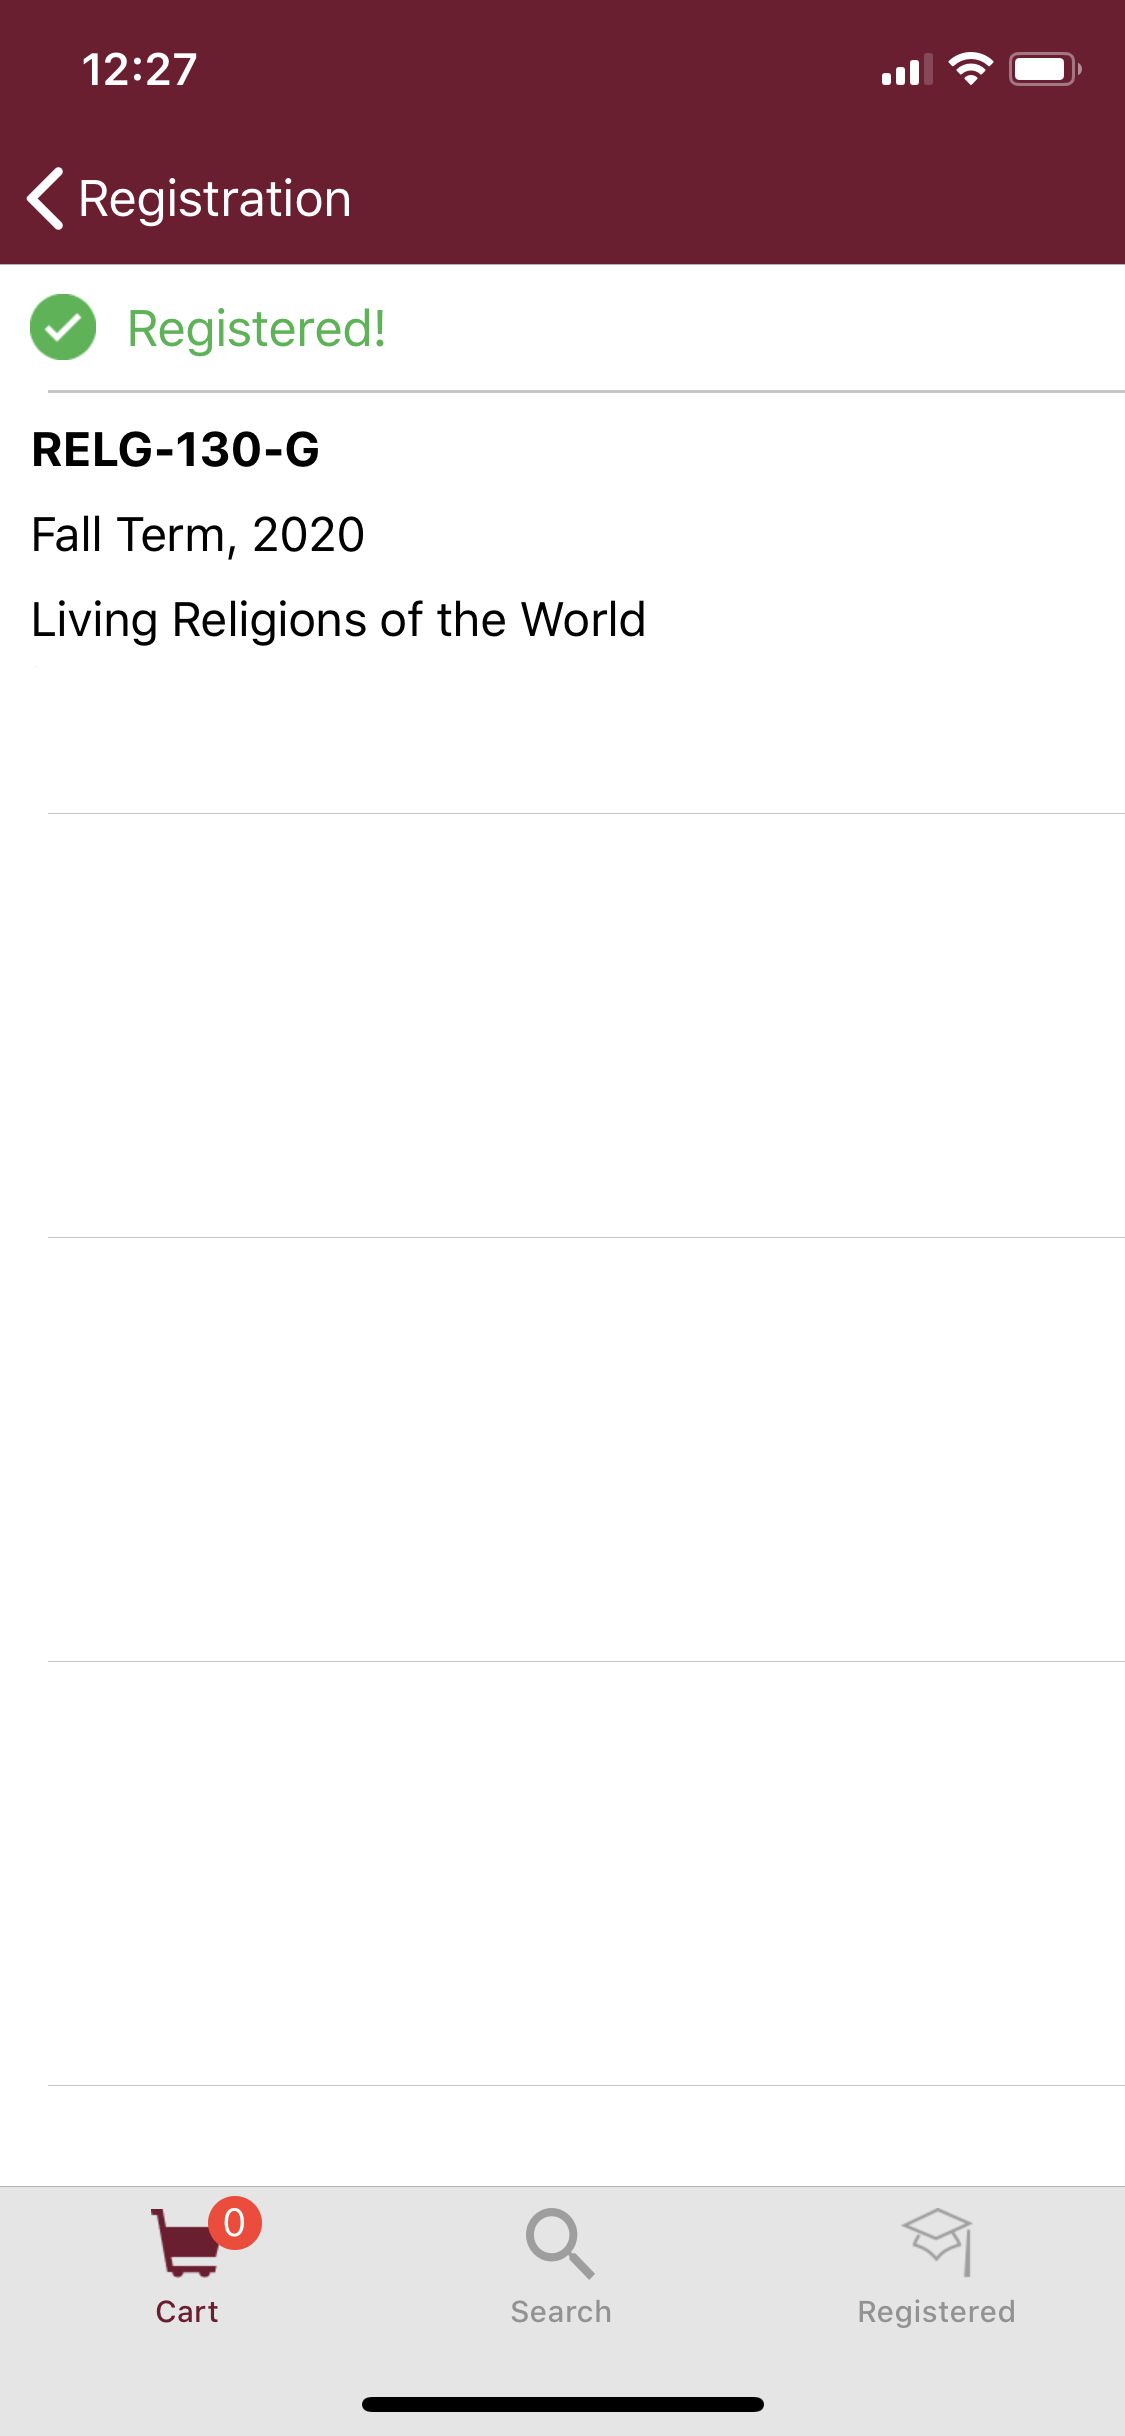
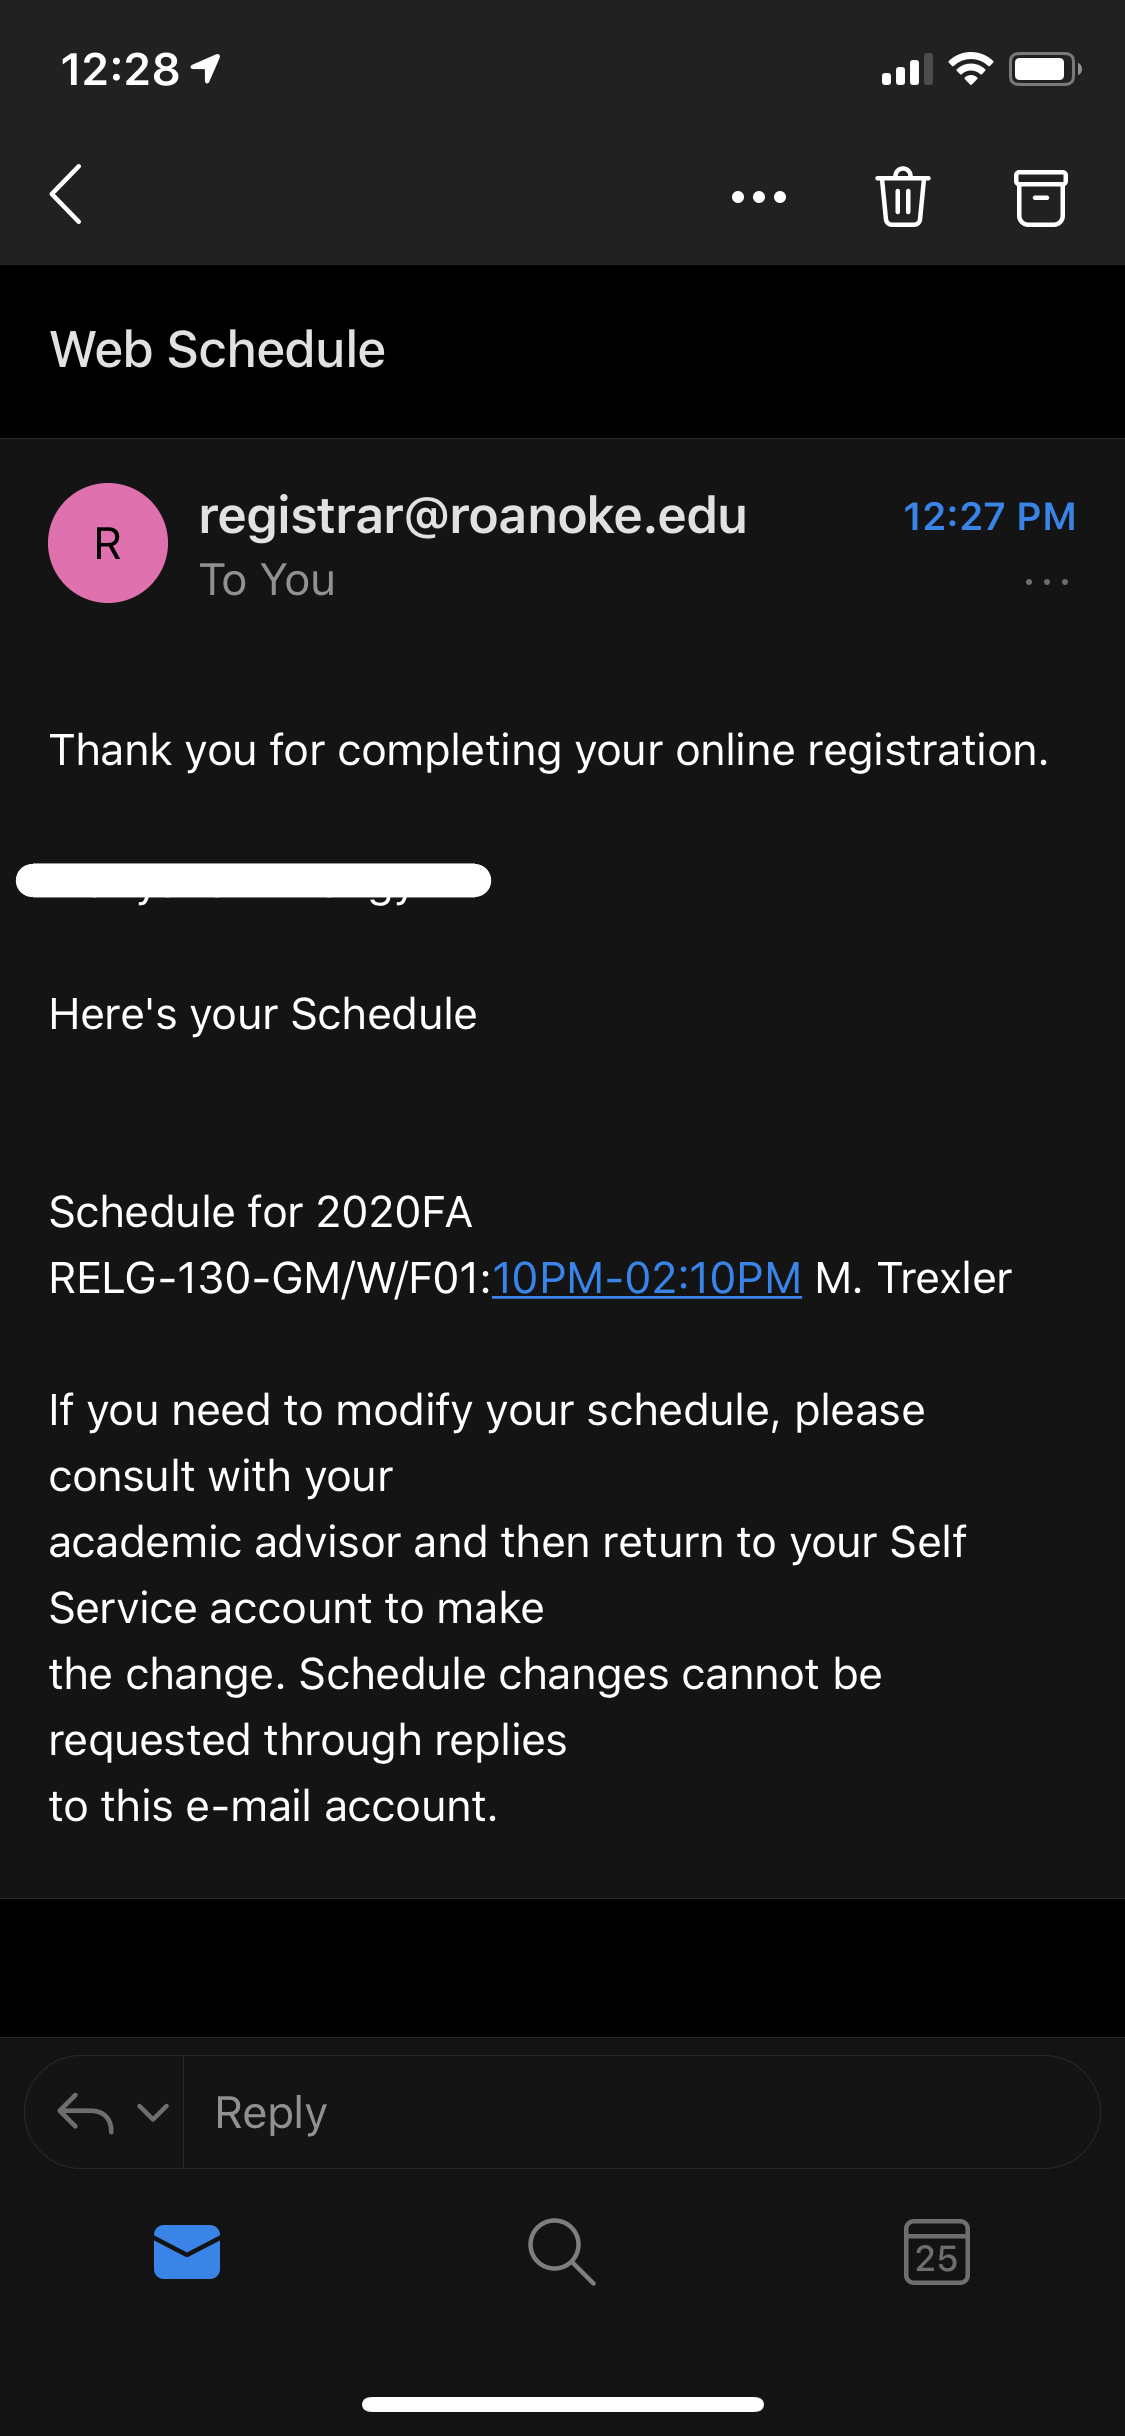
- Once you have successfully registered, you will receive a “Registered!” notification and an email confirmation. If neither of these were received, then you have not successfully registered. Be sure to check that you have selected the correct term and that your assigned pre-registration priority has begun. A variety of other factors could also contribute to unsuccessful registrations, including account holds, section availability (the section capacity has been reached) or if required pre-requisites have not been satisfied.