How to Map a Printer in Windows 11
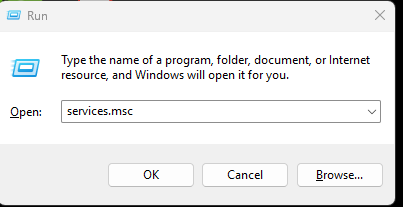
- Open the Run Window:
- Press the Windows key + R on your keyboard at the same time.
- A small box labeled “Run” will appear at the bottom left of your screen.
- Enter the Printer Address:
- In the address box, type:
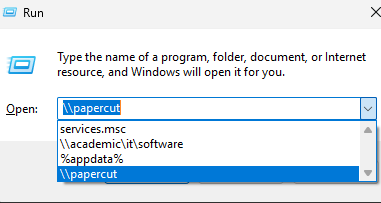
\\papercut - If you know the name of your printer, add a backslash and the printer’s name after
\\papercut- Example:
\\papercut\printer-mfd - After typing the full address, press the Enter key.
- Example:
- If you want to browse for available printers instead, just enter
\\papercut(without a printer name) and click the OK button. -
- In the address box, type:
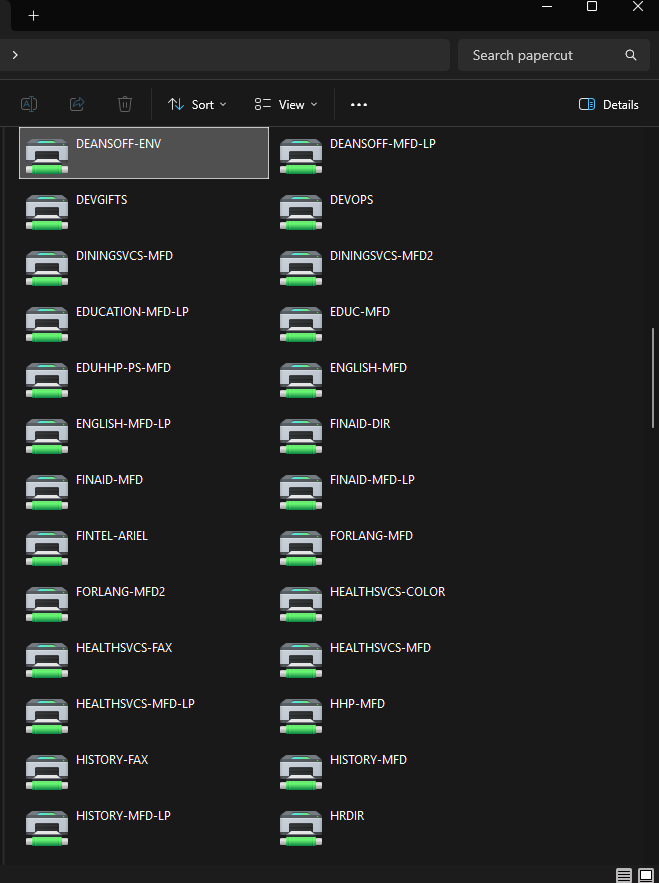
- Browse Available Printers:
- A window will open showing a list of available printers.
- A window will open showing a list of available printers.
- Find the Correct Printer:
- Use the search bar at the top right to find your printer.
- Printer names are typically listed on a red sticker on the printer itself. The name often includes “MFD,” although not always.
- Connect to the Printer:
- Double-click on the printer you want to add.
- The printer will be mapped and added to your computer.