
Part 1: Download the Microsoft Authenticator App from your device’s app store.
- Apple: Click Here
- Android: Click Here
Part 2: Setup the Microsoft Authenticator App
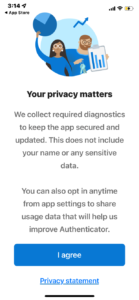
- Open the app, read the Your privacy matters screen, the tap I agree
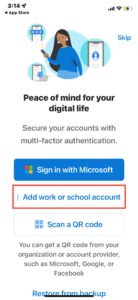
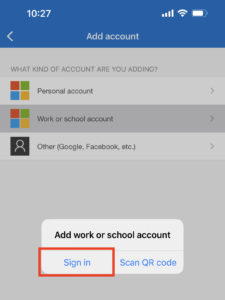
- Tap Add work or school account
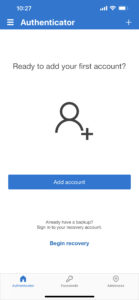
- Choose Add Account
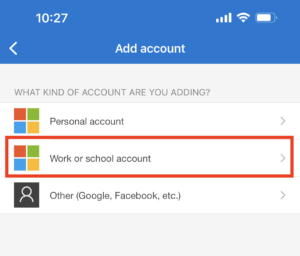
- When prompted to choose an account type, choose Work or School Account
- Chose Sign In
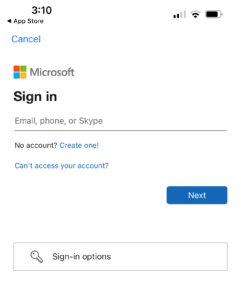
- Enter Roanoke College email and password
Note: for the initial setup, you will need to authenticate through a phone call or text message code
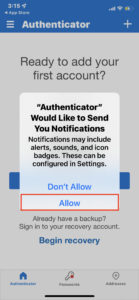
- Tap Allow when asked “Authenticator” Would like to Send you Notifications
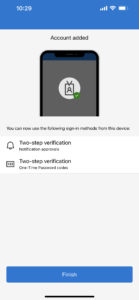
- Tap Finish
 Note: You can add multiple email accounts including non-RC accounts such as Gmail.


Part 3: Using the Microsoft Authenticator app
The Microsoft Authenticator app will generate a notification to your smartphone or give you a one-time code to use for verification.
This is a great option for instances where you do not have cell service and cannot receive a phone call or code via text message.
Note: You will need to be connected to wifi
- Sign into a system that requires MFA
- When asked to Verify your identity, choose one of the following options.
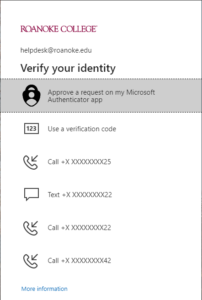

Option 1: Approve a request on my Microsoft Authenticator app
A notification will be sent to your phone requesting you to Approve Sign-in? If you do not see the pop-up notification, open the Microsoft Authenticator app.When prompted, tap Approve


Option 2: Use a verification code
Open the Microsoft Authenticator app. Tap on the account you are trying to verify.
Enter the 6-digit code listed under the One-time password code.
Note: this code changes every 30 seconds


3. Tap Verify